A great way to lighten, brighten, or perfect your photos is by accessing Apple's photo editor right from your project. This is a great way to edit on the go!
Note: Editing your pictures is only available on the Mimeo Photos Mac App
There are important things to know
Mimeo Photo is an extension of Apple Photos, we access your photos via links to your photo library. Our recommendation is to first edit the photos then import them into the project. This will cut down on refresh time.
-
If you exit the Mimeo Photos application to edit your photo, it will reload your project to apply those changes.
-
This also means changes you make while using round trip editing will be applied to the photo in your library.
To engage round trip editing from within Mimeo Photos:
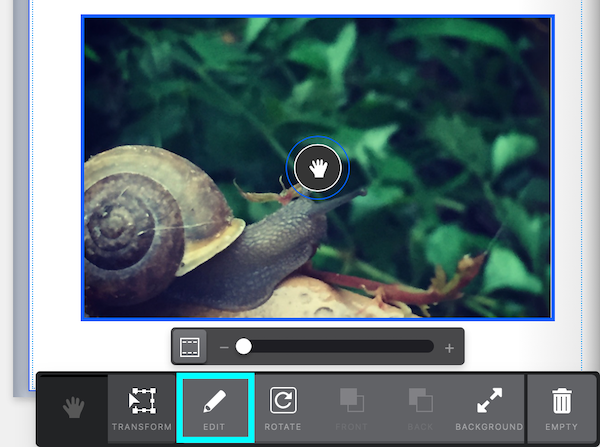
First, Double click on any photo in the layout of your project (not in the photos toolbar) -or - click 'Edit' in the toolbar below the photo
Quick Edits
Like to take the easy route?
Simply click the magic wand in the top right corner. It will show that it is engaged when it is highlighted.

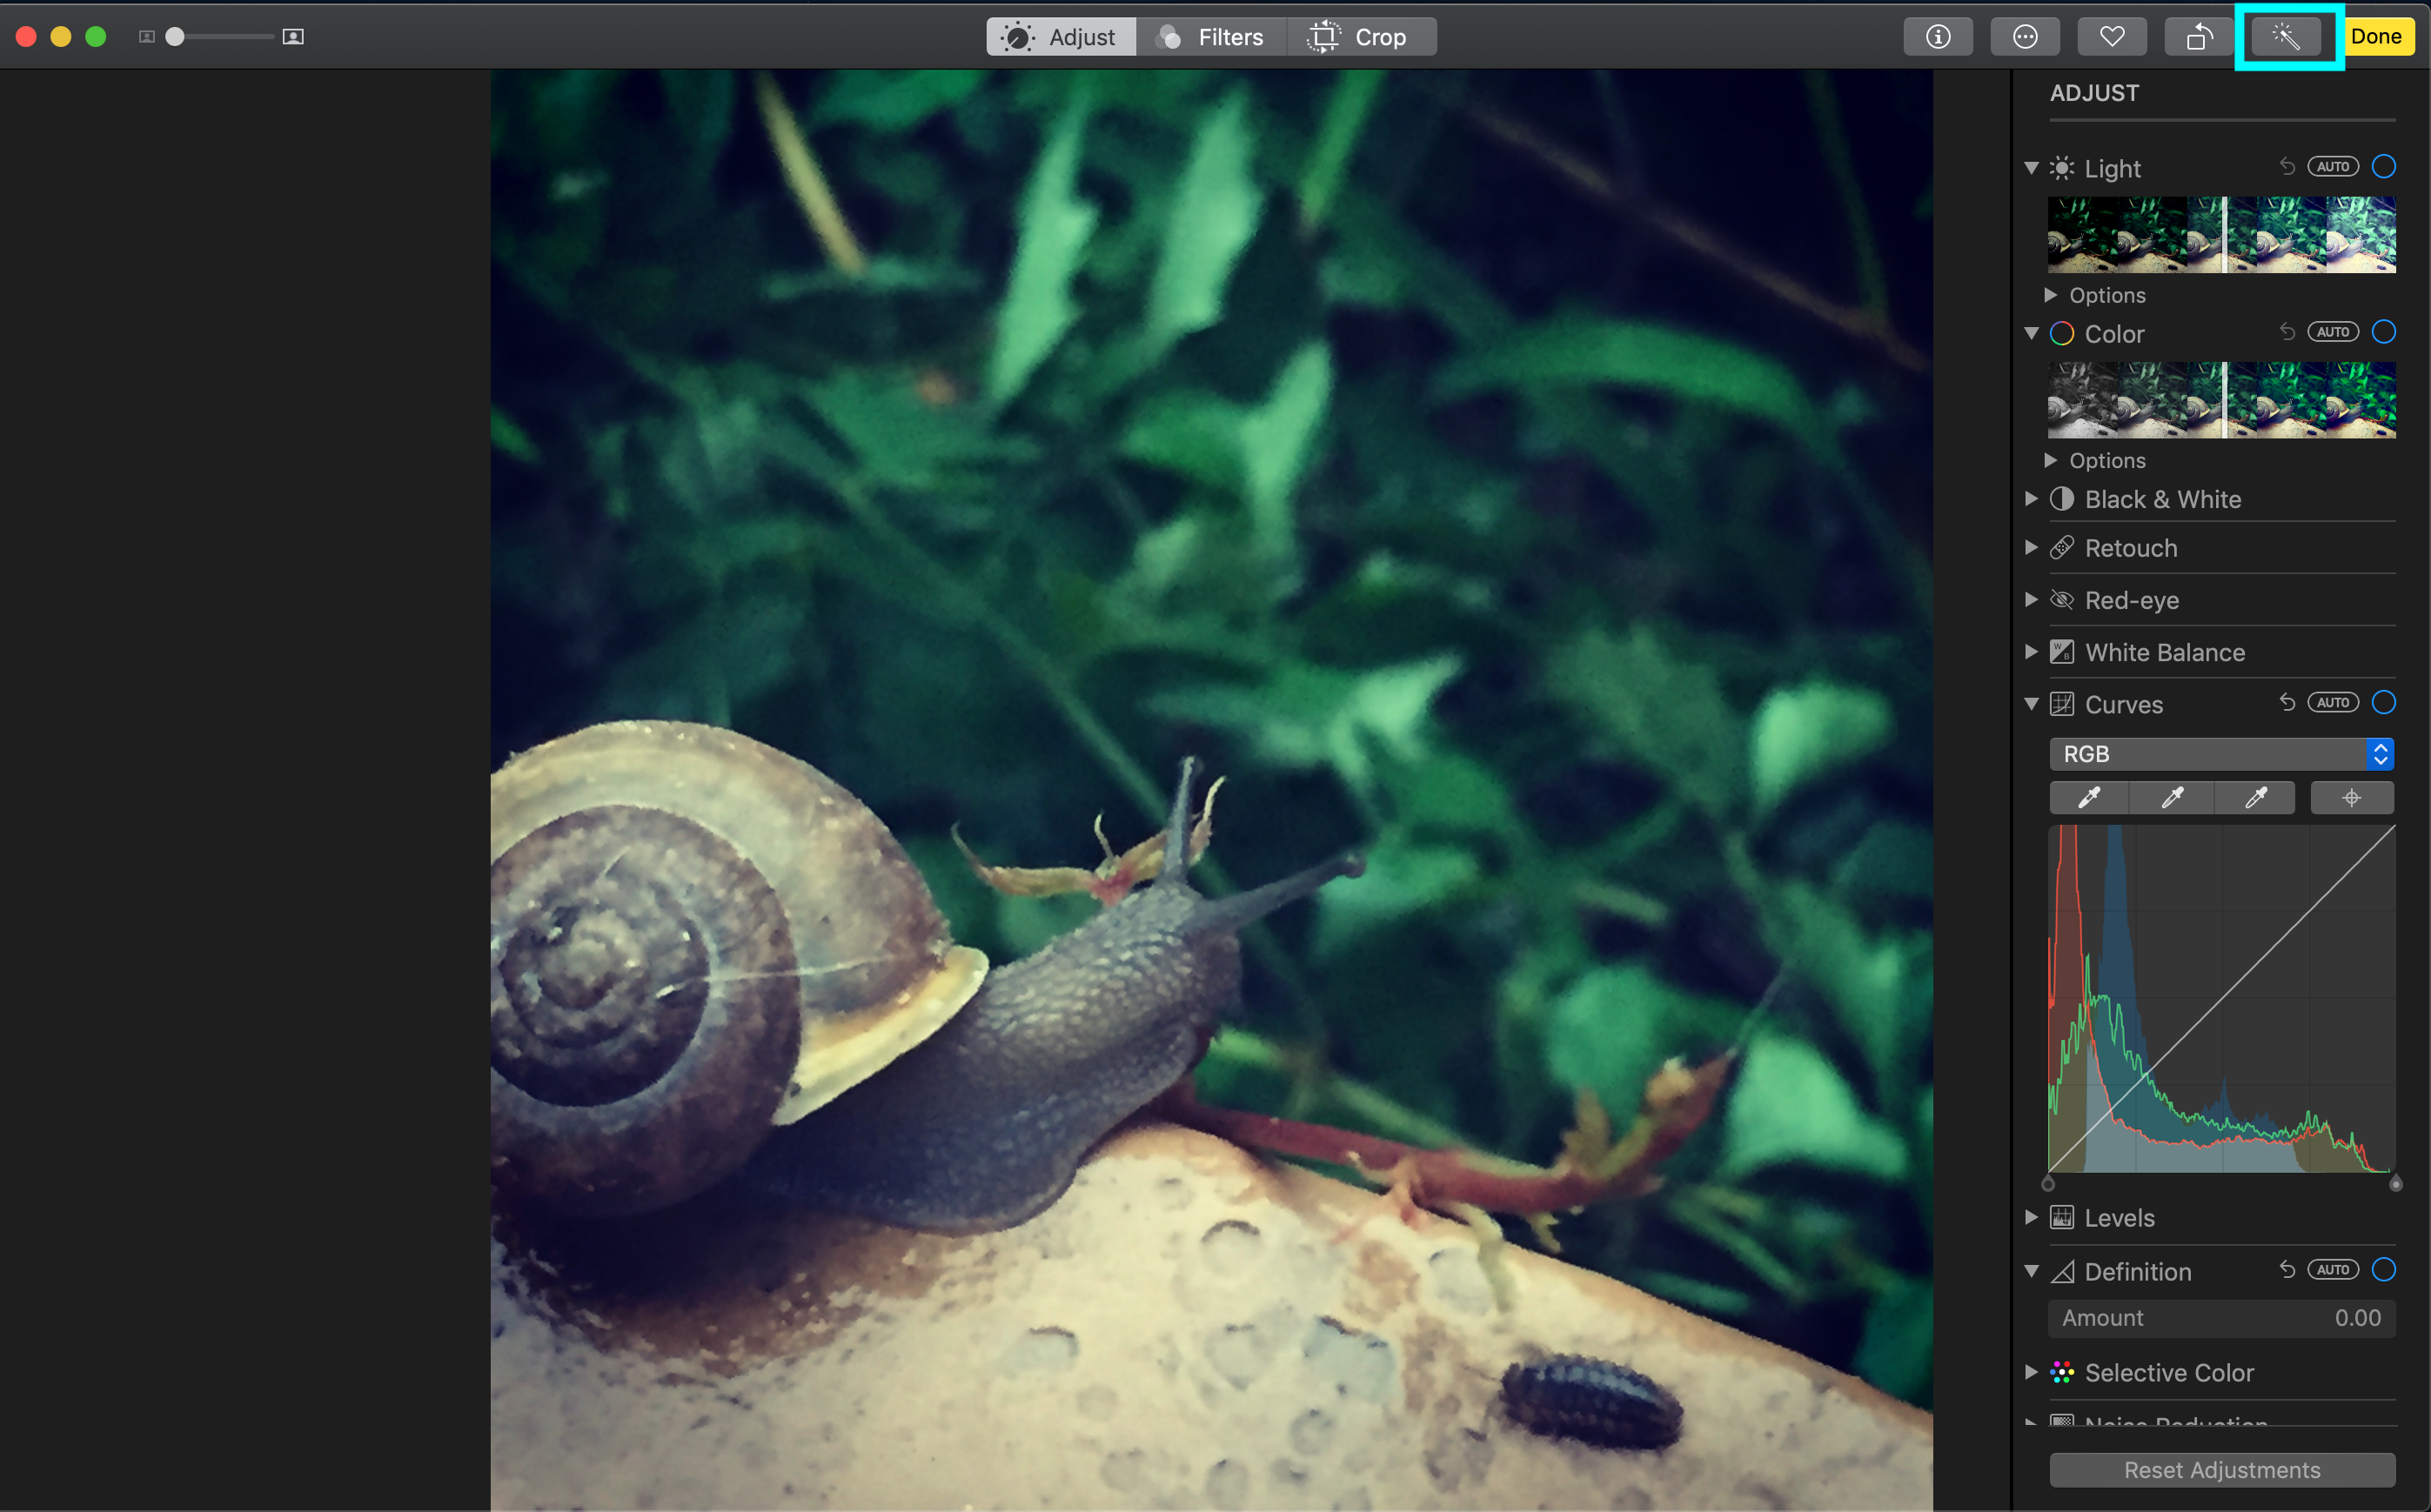
Advanced Edits
Want to make further edits or just be a pro?
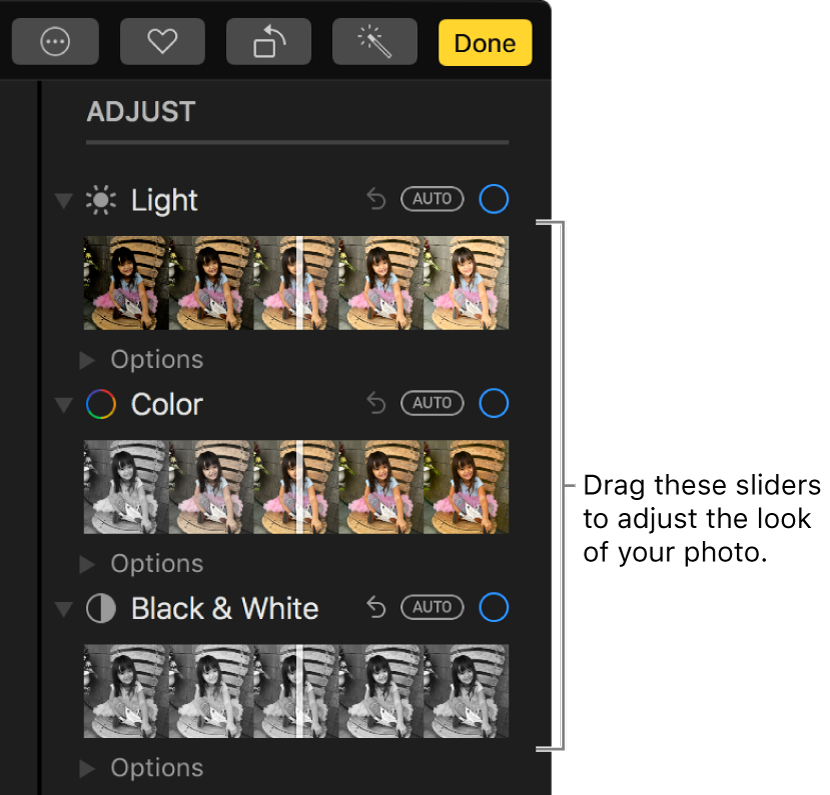
Do any of the following: Click the disclosure triangle next to Light, Color, or Black & White, then drag the slider until you are satisfied with the look of the photo. Or, to have Photos automatically correct the photo, click Auto.
Tips
-
To discard specific changes made to photo settings, double click the slider or use the back button
-
When you make an adjustment, a blue check mark appears next to the adjustment name to indicate a change was made. You can select or deselect the checkmark to turn the adjustment on or off temporarily and see how it affects the photo.
-
To discard all of your changes and revert to its original form, click 'Revert to Original'
-
To compare your changes to the original, click the button on the left with the two boxes.

Make fine light adjustments
You can further fine-tune the adjustments you make to the light settings of a photo:
-
In the Photos app on your Mac, double-click a photo, then click Edit in the toolbar.
-
Click Adjust in the toolbar, click the disclosure triangle next to Light, then click the disclosure triangle next to Options.
-
Drag any of the sliders to change it's properties:
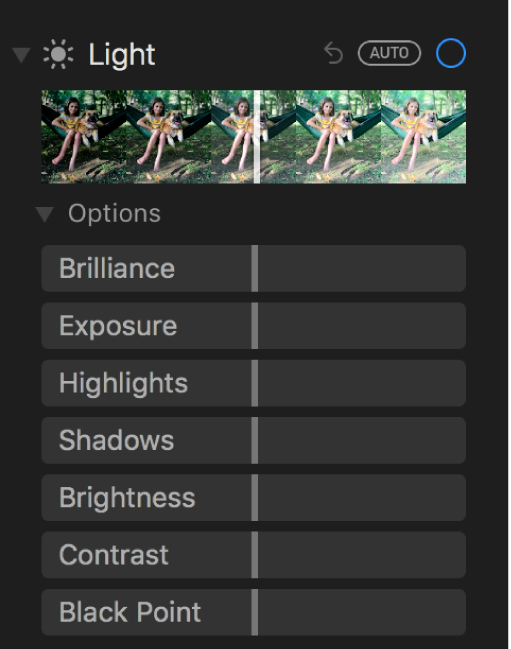
Brilliance: Applies region-specific adjustments to brighten dark areas, pull in highlights, and add contrast to reveal hidden detail and make your photo look richer and more vibrant. The adjustment is color neutral (no saturation is applied), but there may be a perceived change in color because brighter images with more contrast appear more vibrant.
Exposure: Adjusts the tones of the entire image. Highlights: Adjusts the highlight detail.
Shadows: Adjusts the detail that appears in shadows.
Brightness: Adjusts the brightness of the photo.
Contrast: Adjusts the contrast of the photo.
Black Point: Sets the point at which the darkest parts of the image become completely black without any detail. Setting the black point can improve the contrast in a washed-out image.
Pro Tip: Position the pointer over a slider and hold down Option to extend the slider’s range of values.
Make fine color adjustments
You can fine-tune the adjustments you make to the saturation, color contrast, and color cast settings of a photo.
-
Click Adjust in the toolbar, click the disclosure triangle next to Color, then click the disclosure triangle next to Options.
-
Drag any of the sliders to change the photos look:
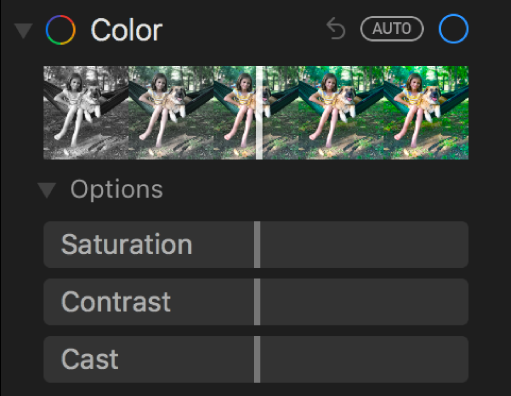
Saturation: Adjusts the photo’s overall color intensity.
Contrast: Adjusts the color contrast and separation between similar colors in the photo.
Cast: Adjusts and corrects for color cast in the photo.
Tip: Position the pointer over a slider and hold down Option to extend the slider’s range of values.
Make fine black and white adjustments
You can fine-tune the intensity of tones and gray areas, and change a photo’s grain.
-
Click Adjust in the toolbar, click the disclosure triangle next to Black & White, then click the disclosure triangle next to Options.
-
Drag any of the sliders to change the photos look:

Intensity: Increases or decreases the intensity of the tones of the photo.
Neutrals: Lightens or darkens the gray areas of the photo.
Tone: Adjusts the photo for a more high-contrast or low-contrast look.
Grain: Adjusts the amount of film grain that appears in the photo.
Apple Inc. (October 2018). Adjust a photo’s light, exposure, and more in Photos on Mac. Retrieved from https://support.apple.com/guide/photos/adjust-a-photos-light-exposure-and-more-pht806aea6a6/mac.
If you are using Mimeo Photos through the web, and not through our Mac extension, these editing applications are a great alternative:
-
VSCO - Check out our blog on how to edit using VSCO