How to Get Started: Prints (Web Version)
How to Get Started: Prints (Web Version)
Follow these steps to start creating perfect prints in multiple sizes and finishes on the Mimeo Photos Web Version.
Navigate to the Prints section of the Mimeo Photos website, then follow the steps below to start creating your prints!

1. Select the type of Prints project you'd like to create. This will lead you to the product page for that style of print.
2. Select the size and finish you'd like, then click the Customize button. You will then be able to name your project, if you wish.

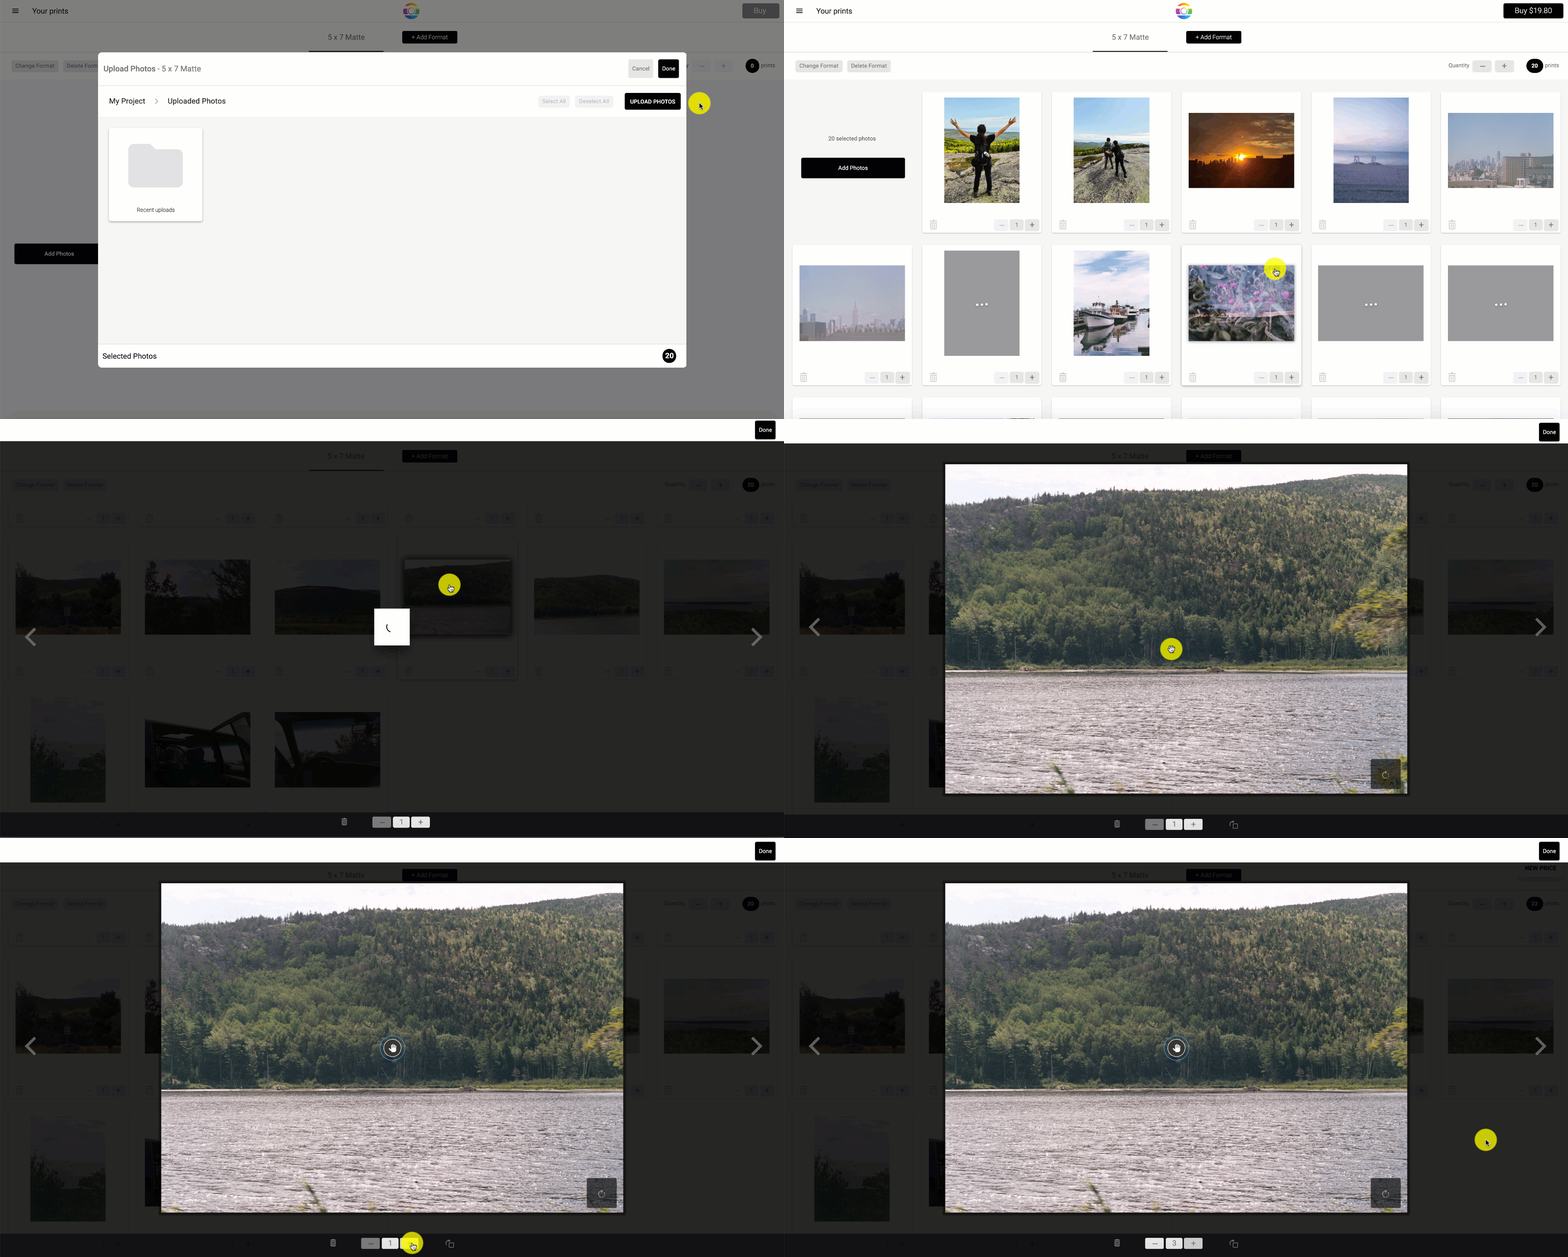
3. Click the Add Photos button to begin adding your photos. You can also use the Add Format button to add additional sizes/formats of prints to your order.

4. To adjust a print, click the photo and use the hand icon to move the image in the crop box. Flip the orientation of the picture using the button on the bottom right-hand corner.
Adjust the number of prints you want for a singular photo by clicking the (-,+) under the image. Alternatively, update the quantity of all your prints by clicking the (-,+) on the top right.

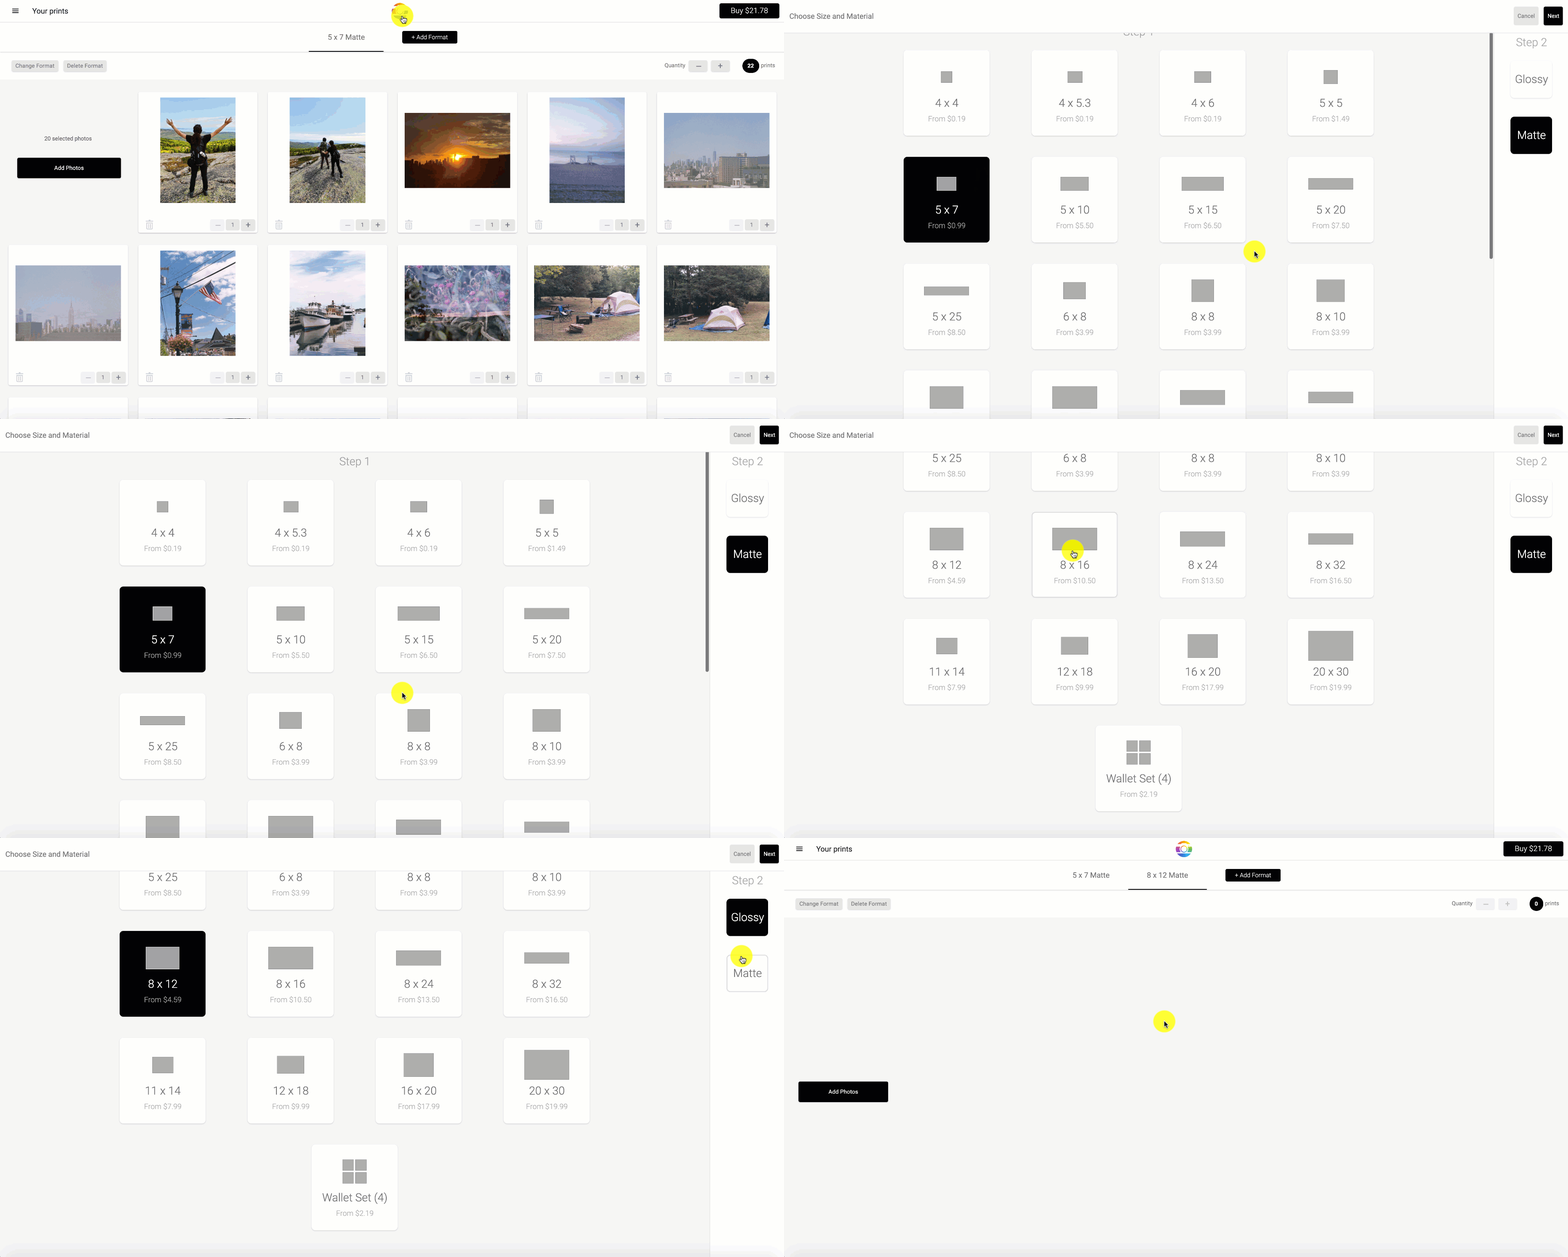
If you want to change the format and finish of your prints:
-
Select Change Format
-
And choose through a variety of different sizes.
To add other print sizes to your order click Add Format

Once you have carefully crafted your photos and completed your project, purchase your prints by clicking the Buy button in the top right corner of the designer. Your prints will then be uploaded and a confirmation email will be sent.
Note: Prints are only available in the United States, Canada, Australia, Europe and New Zealand