How to Get Started: Calendars: Follow these steps to start creating your custom calendar.
After downloading the free Mimeo Photos app in the Mac App Store, follow these steps to start creating your own custom calendar.
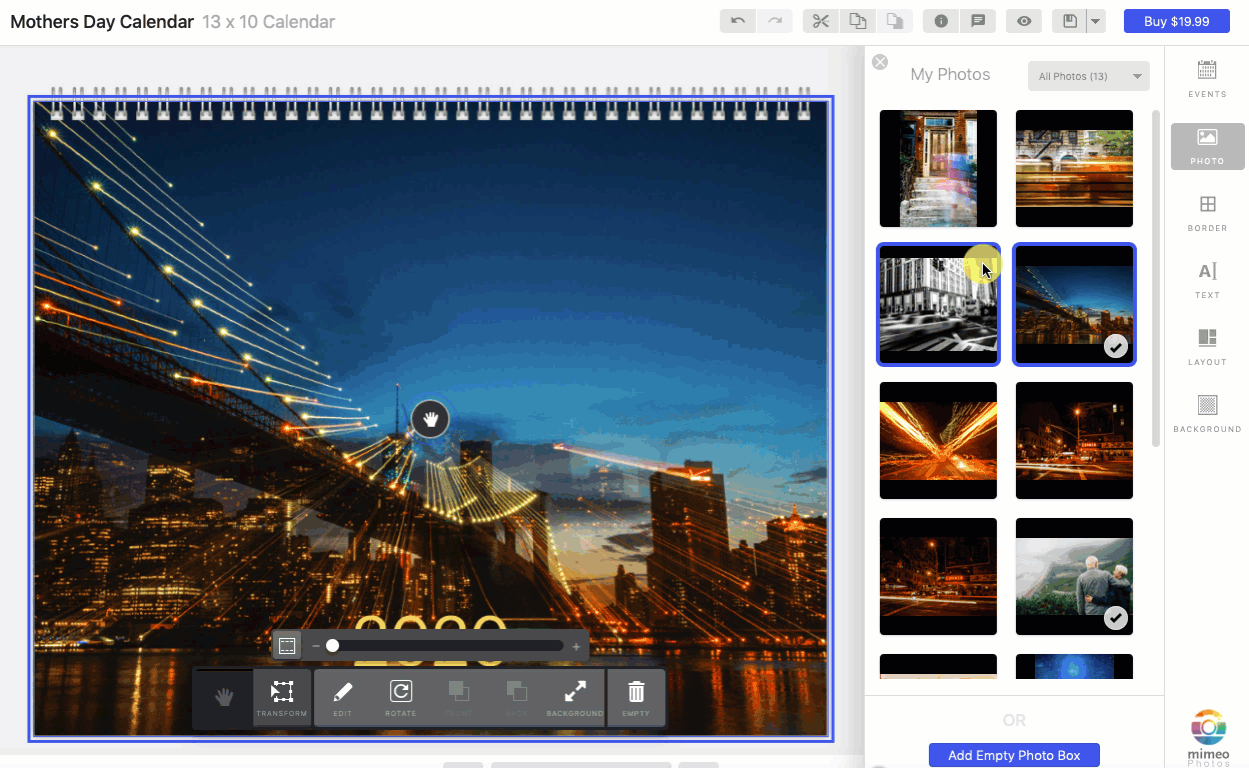
1. Select Your Photos
Select photos or an entire album that you would like to include in your calendar.
Pro tip: If you would like to add more photos after creating your calendar project you can easily do so by dragging and dropping photos into your project.
2. Create Your Calendar Project
Click the plus icon (+) next to My Projects and then select Calendar → Mimeo Photos.
Your new calendar project will automatically open!
3. Choose Calendar Preferences
Select the starting month, year, number of months and what day of the week your calendar will start on. You can also choose to include regional holidays.
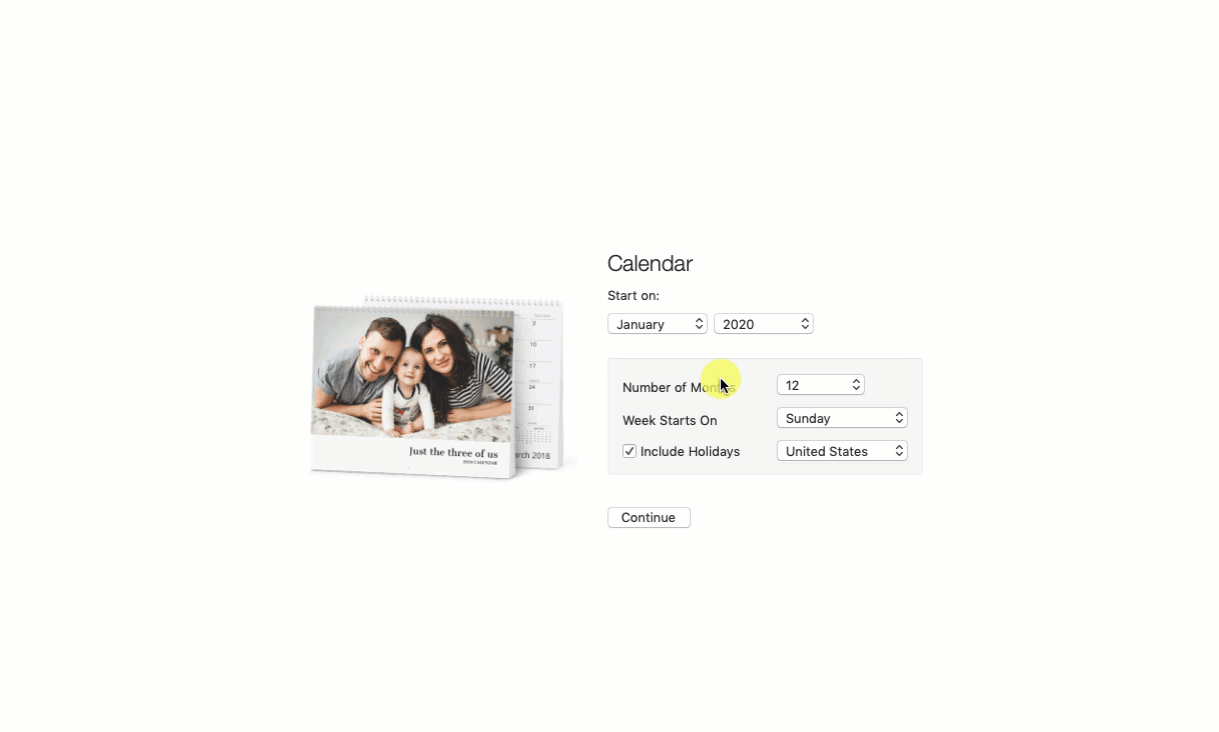
For a list of the regions supported for holidays with Mimeo Photos, check out this article.
Note: You cannot change your calendar starting month after clicking Continue. You can, however, change the starting year.
4. Toggle Autofill Preference
The autofill feature automatically places your photos throughout your calendar. By disabling autofill in the top right corner when prompted to select a theme, you can place your images into the calendar layouts manually.
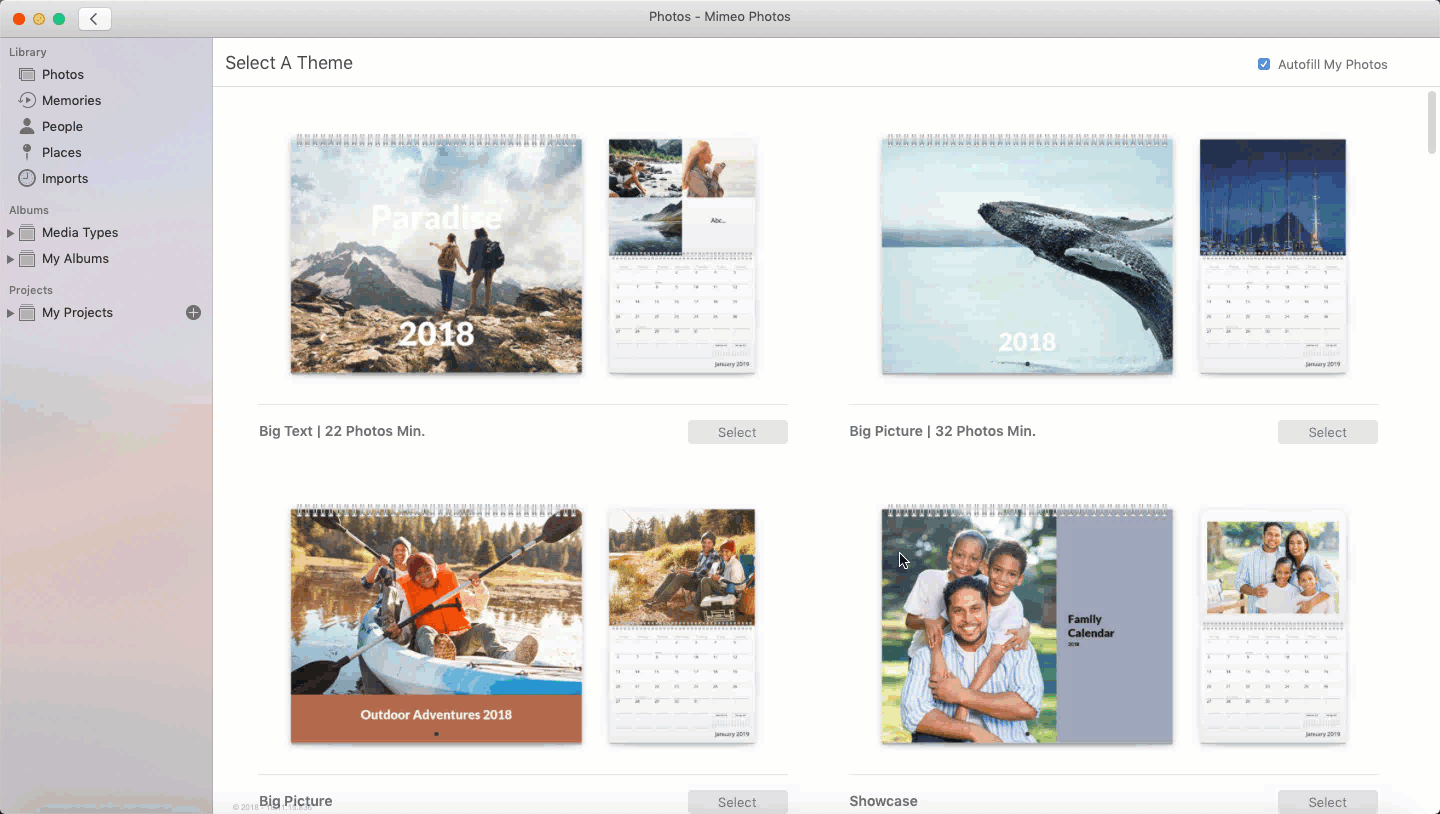
5. Select Your Calendar Theme
Mimeo Photos offers a variety of themes to pre-design your calendar with unique layouts, fonts, and colors. If you want more control over the design, start from scratch with the blank theme.

Note: Calendar themes cannot be changed after you click Select.
6. Customize Your Calendar
Customize your calendar with additional edits, adjustments, and designs. Mimeo Photos offers a multitude of layouts, background colors, text options, and more to create a calendar exactly to your imagination. Even try adding a photo on the back cover!
7. Add Special Events
Add special events to specific dates on your calendar with Mimeo Photos.
-
Select the Events button on the right-hand panel
-
Navigate to the month of your event
-
Click Add New Event, select the date, and add text and/or an image
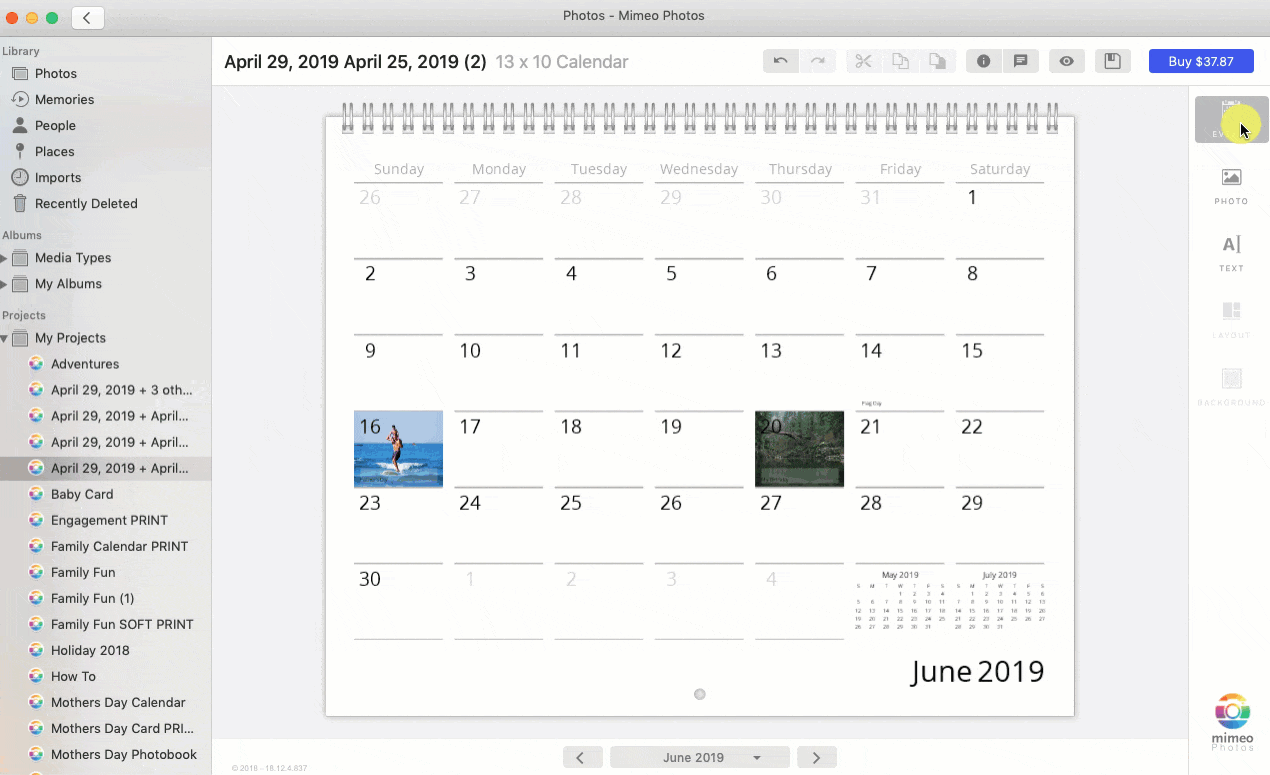
Note: You can edit the size and color of your text, but you cannot edit the actual date number.
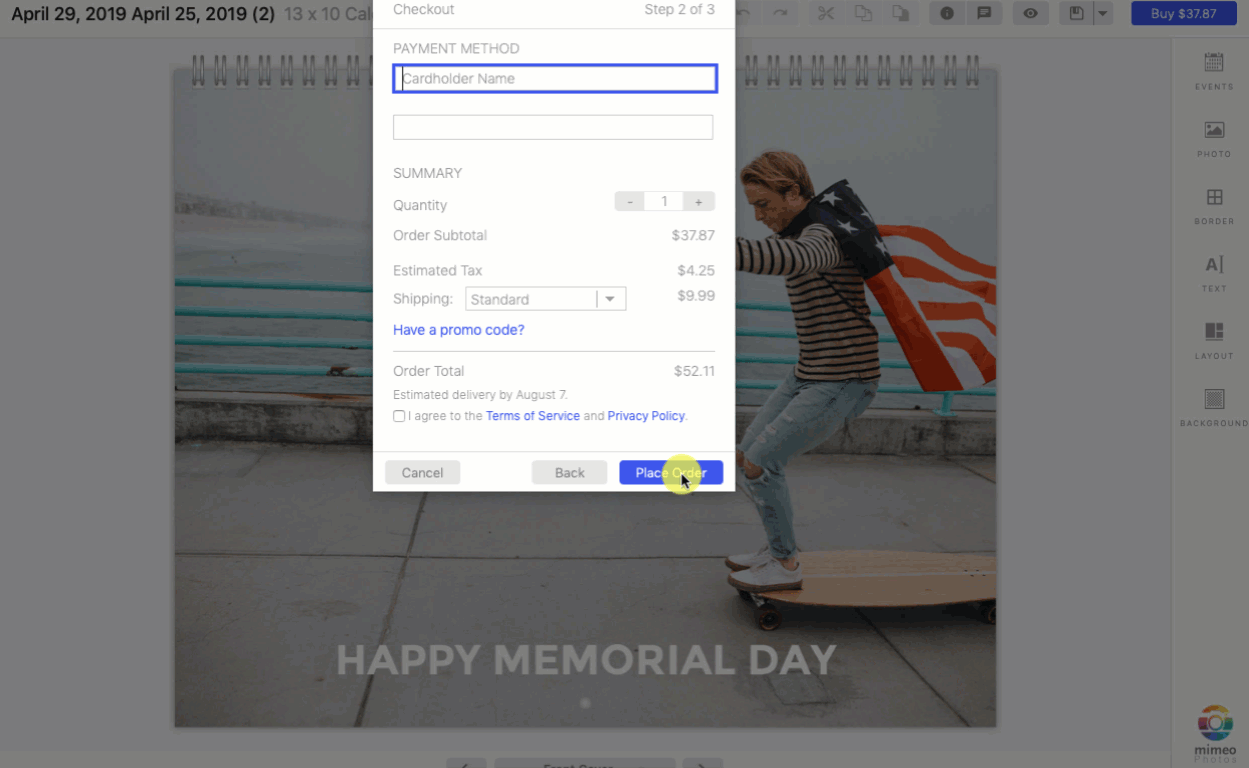
8. Ordering Your Calendar
After your calendar is ready to print, select the Buy button on the top right corner.
After inputting shipping and credit card information, you can also adjust the quantity of your order.
Did this answer your question?